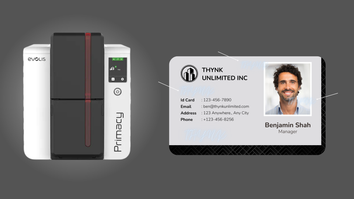
The Evolis Primacy 2 is renowned for its ability to produce high-quality ID cards with advanced security features. Among its standout capabilities is UV printing—the process of embedding invisible images or text that only appear under UV light. This feature adds a layer of security against forgery and tampering. This guide will walk you through the steps to set up and customize UV printing on the Evolis Primacy 2.
What is a UV Effect?
The UV effect involves printing an invisible layer of text or imagery onto the card's surface. These details are revealed only under UV light, making them an excellent tool for branding, personalization, or hidden security.
Required Ribbons for UV Printing
UV printing is supported by the following ribbons:
- YMCKO
- YMCKOK
- 1/2YMCKO
- 1/2YMCKOKO
- YMCKOO
Tip: If wear protection is a concern, use a YMCKOO ribbon to limit UV effects to one overlay panel, or laminate the card for added durability.
Activating the UV Effect
Once you've selected the right ribbon, it's time to configure the printer. Follow these steps in your Evolis printer’s software:
- Go to Printer Settings.
- Navigate to the Overlay section, then click on Overlay Application.
- In the settings, find the option labeled UV Effect and enable it by clicking the appropriate checkbox.
This action will activate the UV printing capability and allow your card designs to incorporate the hidden UV image or text.
Formatting Your UV Image
If you plan to add specific text or images as UV effects, make sure to format them properly in your design. The Evolis Primacy 2 offers the option to adjust the application of the UV effect to either one or both of the overlay panels. This flexibility allows you to fine-tune the intensity of the UV effect. You can also use custom algorithms to improve the UV image’s visibility, especially if your design features complex patterns or faces.
To format a UV image:
- Navigate to Printer Settings > Overlay > Overlay Application.
- Under the UV Effect to Apply section, select either Apply UV Effect to Both Overlay Panels or Apply UV Effect to One Overlay Panel.
Choosing to apply the effect to only one overlay panel (for ribbons like YMCKOO) will help maintain some level of protection against wear, which is important since applying a UV effect can reduce the protection provided by the overlay.
Protecting the Print
While UV printing adds a unique and secure feature to your cards, it also reduces the overall durability of the card’s overlay. To compensate for this, you can choose to laminate your cards after printing. Laminating the cards ensures the overlay remains protected from wear and tear.
Alternatively, if you’re using a YMCKOO ribbon, you can apply the UV effect to just one overlay panel. This option can reduce the wear on the card while still ensuring some level of UV visibility.
Spared Areas for Sensitive Data
It’s essential to avoid applying the UV effect on areas of the card that contain sensitive information, such as magnetic stripes or contact chips. The Evolis Primacy 2 software allows you to specify Spared Areas, which prevents the UV effect from being applied to these critical sections.
To set this up:
- Go to Printer Settings > Overlay > Spared Areas
- Choose the areas of the card where you don’t want the UV effect applied (e.g., magnetic stripes or contact chips).
This ensures that the data remains readable and unaffected by the UV print.
Adjusting the Contrast
If your UV image or text doesn’t appear as clearly as you’d like when exposed to UV light, you can adjust the Contrast settings to fine-tune the effect. Increasing the contrast makes the UV image more prominent under the UV torch.
To adjust the contrast:
- Go to Printer Settings > Overlay > Contrast
- Increase or decrease the contrast to achieve the desired UV effect. Higher contrast will typically make the UV image or text stand out more under UV light.
Test Your Print
Once all settings are configured, it’s a good idea to print a test card. Examine the result under a UV light to ensure the image or text appears as expected. If you’re not satisfied with the result, you can tweak the contrast, adjust the UV image placement, or reapply the UV effect using the algorithms for a better outcome.
Contact us today
The Evolis Primacy 2 is a powerful tool for printing cards with UV images, combining security and creativity. By following the above steps, you can easily incorporate a UV effect into your card designs, making them both visually striking and secure. Whether you're printing ID cards, membership cards, or any type of secure credential, the UV effect adds a layer of protection that’s difficult to replicate. Experiment with the settings to find the perfect balance between visibility, security, and durability for your cards. Contact us today if you still have question or are still having trouble using the UV effect on your Primacy 2.

