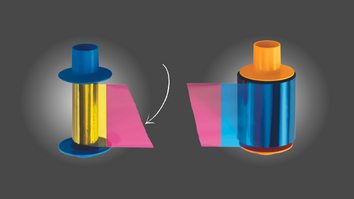
ID printer ribbons are crucial for producing high-quality identification cards. When a ribbon breaks, it can disrupt your workflow and delay production. Fortunately, many ribbon issues can be resolved with quick repairs. Follow this guide to repair a damaged ID printer ribbon and prevent future problems.
Identify the Issue
Ribbon damage often causes printing defects, such as streaks, gaps, or failed prints. Start by opening your printer and inspecting the ribbon cartridge for tears, tangles, or misalignment.
Remove the Ribbon Cartridge
Refer to your printer’s manual to access the ribbon compartment. Unlock and lift the printer cover carefully to avoid causing further damage. Gently remove the ribbon cartridge and place it on a clean surface.
Assess the Ribbon Damage
Examine the ribbon for:
- Tears: Look for any breaks in the ribbon.
- Creases: Smooth out wrinkles that could affect print quality.
- Tangles: Gently untwist tangled areas to restore proper alignment.
Repair the Ribbon with Tape
- Align the Ribbon Ends: Bring the broken ends together, ensuring proper alignment.
- Apply Clear Tape: Use a small piece of transparent tape to join the ends. Trim excess tape to prevent interference during printing. Press the tape firmly to secure the repair.
Reinstall and Test
After repairing the ribbon:
- Rethread it into the cartridge if necessary.
- Close the printer cover securely.
- Power on the printer and perform a test print. Check the results to ensure the repair was successful.
Replace Severely Damaged Ribbons
If the ribbon is beyond repair, replace it with a new one compatible with your printer. Follow the manufacturer’s guidelines for proper installation to avoid further issues.
Maintain Your Printer Regularly
Prevent ribbon damage by keeping your printer clean and well-maintained:
- Clean the Ribbon Path: Remove dust or debris that could cause jams or tears.
- Follow Maintenance Schedules: Adhere to the manufacturer’s recommendations to extend the life of your printer and ribbons.
Check Blank Cards for Debris
Inspect blank cards for any dirt or particles before printing. Slot punching should be done after printing to avoid burrs that may damage the ribbon.
Adjust Your Printing Technique
For direct-to-card (dye-sublimation) printers, avoid printing too close to the card's edge, as this can snap the ribbon. Retransfer printers are designed for edge-to-edge printing, making them a better option for designs requiring full coverage.
Clean and Calibrate Your Printer
- Clean Regularly: Use cleaning kits designed for your printer model to keep the interior free of debris.
- Calibrate the Ribbon Sensor: Follow your printer’s manual for instructions on recalibrating the ribbon sensor after ribbon replacement.
Need Assistance? Contact Us Today!
Repairing a damaged ID printer ribbon is a valuable skill that minimizes downtime and ensures uninterrupted card production. By following this guide and performing regular maintenance, you can keep your printer in excellent condition and extend the life of your ribbons.
If you encounter persistent issues or need professional assistance, don’t hesitate to contact us. We’re here to help you with all your ID card printing needs!

