
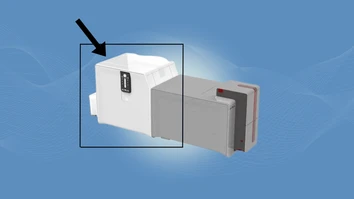
Adding a Card Lamination Module (CLM) to the Evolis Primacy 2 creates a complete card printing and lamination solution. The CLM works with the Primacy 2 to laminate printed cards and provide additional protection against everyday wear, scratches, UV exposure, and other factors. The two units communicate through infrared, allowing them to operate together as one system.
Connecting the CLM to the Primacy 2 is a straightforward process, but proper positioning and alignment are important for the system to communicate correctly.
What You Need Before Getting Started
Before connecting the CLM to your Primacy 2, make sure you have:
- An Evolis Primacy 2 card printer
- A compatible Evolis Card Lamination Module
- The installation platform
- The printer power supply
- The lamination module power supply cable
- The printer USB cable
- Access to an earthed power socket
The CLM is available as an option for the Primacy 2 and connects to the printer through infrared rather than a physical communication cable.
Step 1: Place the Printer and Lamination Module
- Start by installing both the Primacy 2 printer and the CLM on a flat, stable surface.
- Make sure there is enough room around both units to operate the equipment and access the card and film areas when needed.
- A stable surface is important because the two units need to remain properly aligned once they are connected.
Step 2: Place the Primacy 2 on the Installation Platform
- Position the Primacy 2 printer on the "Printer" side of the installation platform.
- Make sure the printer is seated correctly and securely on the platform before continuing.
Step 3: Connect the Printer
- Connect the Primacy 2's power supply and USB cable.
- The USB connection will eventually connect the printer to the computer, allowing the computer to communicate with the printing system.
- The Primacy 2 supports USB connectivity as well as Ethernet, with Wi-Fi available as an option.
Step 4: Connect the Lamination Module Power Supply
- Next, connect the lamination module power supply cable to the CLM.
- Do not power everything on yet. First, complete the physical positioning and alignment of the two units.
Step 5: Place the CLM on the Installation Platform
- Place the Card Lamination Module on the "Laminator" side of the installation platform.
- The CLM should sit directly next to the Primacy 2 so that the two units can communicate with one another.
Step 6: Align the Infrared Connectors
- This is one of the most important steps.
- Make sure the infrared connectors on the Primacy 2 and CLM are facing each other.
- Then check that the two modules are properly aligned on the installation platform.
- The CLM communicates with the Primacy 2 through infrared, creating a connected printing and lamination system without requiring a communication cable between the two units.
Tip: If the modules are not properly aligned, the infrared communication may not work correctly.
Powering On the Primacy 2 and CLM
Once the printer and lamination module are physically connected and properly aligned, you can power on the system.
1. Plug in the CLM - Connect the lamination module's power cable to an earthed power socket.
2. Plug in the Primacy 2 - Connect the Primacy 2's power supply to an earthed power socket.
3. Connect the Printer to the Computer - Connect the Primacy 2's USB cable to the computer. At this point, the system can be powered on.
How to Know the System Is Connected
After powering on the equipment, the Primacy Lamination control panel should illuminate, indicating that the machine is operating properly.
The CLM's control panel provides information about the module's operating status and can also provide notifications related to cleaning, cards, and lamination film.
If the system does not appear to be communicating properly, first check that:
- Both units are receiving power.
- The printer USB cable is properly connected.
- The Primacy 2 and CLM are positioned correctly.
- The infrared connectors are facing one another.
- The two modules are properly aligned on the installation platform.
What Does the CLM Add to the Primacy 2?
Connecting the CLM turns the Primacy 2 into a more complete card personalization solution. The Primacy 2 handles card printing and optional encoding, while the CLM applies a protective laminate to the finished card.
The CLM supports single- and double-sided lamination and includes an integrated card flattener. Depending on the configuration, the system can produce up to 215 laminated single-sided cards per hour or 110 double-sided cards per hour.
Evolis also offers different laminate options, including clear and holographic patches and varnishes. These can provide additional protection while helping organizations add security features to their cards.
Keep Your Primacy 2 and CLM Properly Maintained
Once your Primacy 2 and CLM are installed, regular maintenance is important for keeping the system operating reliably. Evolis recommends regular cleaning sequences for the lamination module, and the module can provide cleaning alerts through its control panel.
Keeping both components clean and using the appropriate cards, ribbons, and lamination films can help maintain consistent card quality and minimize interruptions.
A Simple Way to Upgrade Your Primacy 2
Connecting the Evolis CLM to the Primacy 2 allows organizations to print and laminate cards as part of a streamlined workflow. The key to a successful installation is making sure both units are positioned correctly, the infrared connectors face each other, and the modules are properly aligned before powering on the system.
Once connected, the Primacy 2 and CLM can work together to create durable, professionally finished cards with added protection.
Need help finding the right Evolis Primacy 2, CLM, ribbons, or lamination supplies? Contact us today and let our team help you find the right products and supplies for your card printing needs.